Flexing RStudio/knitr where you want can be a challenge. The image is CC by Ben Barnes.
Fast-track publishing using knitr is a short is a short series on how I use knitr to get my articles faster published. This is part II where I will show how you can tweak RStudio into producing seamless MS Word-integration by using the .RProfile together with CSS, a few basics about HTML that might be good to know, and lastly some special characters that can be useful. In the previous post, part I, I explained some of the more general concepts behind fast-track publishing and why I try to get my manuscript into MS Word instead of using LaTeX or other alternatives.
The series consists out of five posts:
- First post – an intro motivating knitr in writing your manuscript and a comparison of knitr to Word options.
- Second post – setting up a .RProfile and using a
custom.cssfile (current post). - Third post – getting your plots the way you want.
- Fourth post – generating tables (current post).
- Fifth post – summary and example.
RStudio is in my opinion currently the best tool for using knitr. It allows code folding, navigating through chunks, direct knitr integration, spell checking, and is actively being developed. It is therefore a little odd that the default markdown document generated in knitr looks… terrible:
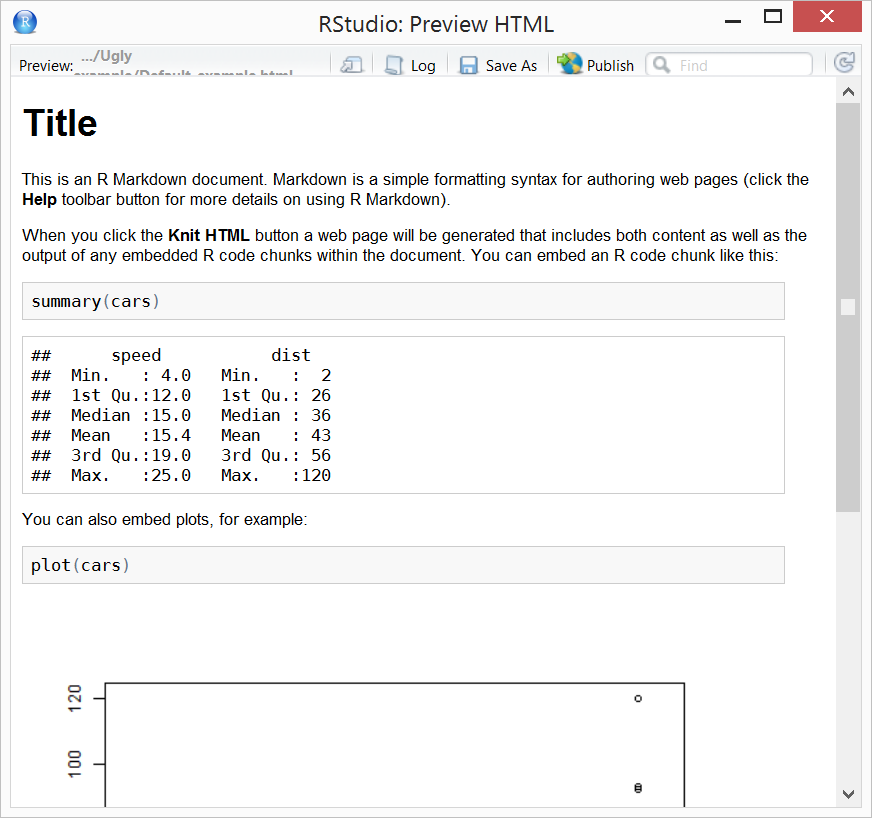
As you can see there are no margins, allowing no white space that would enhance the reading. As nicely put by Carrie Cousins:
“Don’t forget about the margins. Remember to leave some white space around the entire text frame, creating an almost invisible halo. This margin will help set text apart from other “noise,” easing the reader into the copy.”
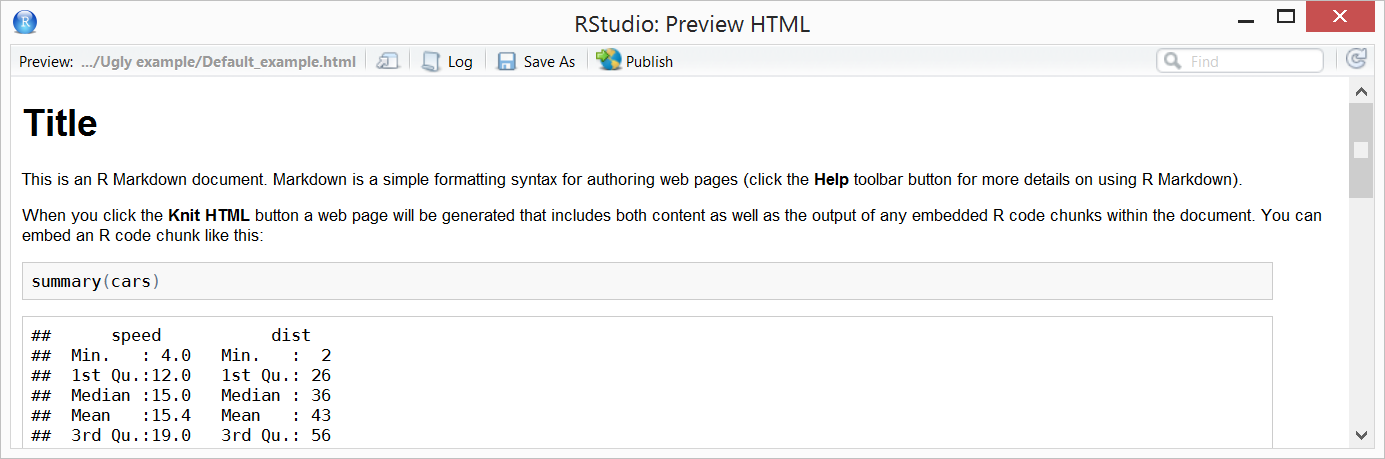
This becomes even more difficult to read if we change the window width:
The solution to this is to attach your own CSS file. RStudio has a basic help page that you can find here about changing the CSS. Important to remember is that changing the CSS-rendering must be done before knitting the document.
Inspired by LaTeX’ wide margins, I usually submit my manuscript with wide margins (2 inches/5.08 cm left and right) in order to keep the optimal character count between 65 and 75 characters per line. This helps reading the document and hinting how the paragraphs (more guidelines) will feel in the published article.
A RStudio/knitr .RProfile
The .RProfile is a document allowing you to execute code at startup. All you need to do is create a file called .RProfile in your home directory, If you are uncertain: then start RStudio (close any open project) and write getwd() = your home directory. The home directory is on OS X/Unix/Linux systems located at the “~/” directory, in Windows 8 this is the “Documents” or “My Documents” folder, Windows 7 it is your user folder (the one with your username).
My .RProfile has a few tweaks in it:
- Use custom.css if exists: If there is a file at the same location as the knitr .Rmd document called
custom.cssit automatically switches to this alternative. As this runs at startup I don’t need to worry about running any code before knitting. - Skip embedded png: Libre Office can’t handle embedded png-images, it hangs as it tries to process them. You can still use embedded png-images by specifying:
options(base64_images= "inline"). - Fix headers: Libre Office “forgets” the margins for the headers object if they are specified in the CSS, I have therefore a crude gsub() fix for this, to skip it simply set the option
options(LibreOffice_adapt= "skip").
cat("\n ** Starting .RProfile **")
options(rstudio.markdownToHTML =
  function(inputFile, outputFile) {
    require(markdown)
    htmlOptions <- markdownHTMLOptions(defaults=TRUE)
    # LibreOffice hangs when the png is included in the html file
    # I have therefore this option where you actively
    # have to choose inline if you want the png to be inline
    if (getOption("base64_images", "No") != "inline")
      htmlOptions <- htmlOptions[htmlOptions != "base64_images"]

    # Now in this section we skip writing to the outputfile
    # and keep the markdown text in the md_txt variable
    md_txt <- markdownToHTML(inputFile, options = htmlOptions,
                   stylesheet=ifelse(file.exists('custom.css'),
                                     'custom.css',
                                     getOption("markdown.HTML.stylesheet")))

    if (getOption("LibreOffice_adapt", "Yes") == "skip"){
      writeLines(md_txt, con=outputFile)
    }else{
      # Annoyingly it seems that Libre Office currently
      # 'forgets' the margin properties of the headers,
      # we therefore substitute these with a element specific
      # style option that works. Perhaps not that pretty but
      # it works and can be tweaked for most things.
      writeLines(
        gsub("",
             "",
             gsub("",
                  "",
                  md_txt)),
        con=outputFile)
    }
  }
)

# I’ve  added some automated comments just as a reminder, remove
# the cat() if you want the .RProfile to be quiet (note, the output does
# not affect the knitr document)
cat("\n * If you want knitr markdown png-files to be inside the document",
    " then set the options(base64_images = 'inline') for it to work.")
cat("\n * If you don't want the Libre Office adaptations then set",
    " options(LibreOffice_adapt = 'skip')")
cat("\n * If you want knitr markdown to use a custom css then",
    " just input a 'custom.css' file in the Rmd file's directory.")
cat("\n ** End .RProfile **\n")
The custom.css file
CSS is extremely flexible although it is important to keep in mind that if you aim at Libre Office or MS Word import these are rather limited in their CSS abilities. I use the one below that is optimized to be as similar as possible to the Word template and imports nicely (copy the text into a file that you name custom.css):

/* Set the main font to Calibri, same
   as My Word 2010 uses. Also set the
   default font size to 11pt.

   The maximum width to 35em enhances
   readability through optimal line
   length. Note: this setting is ignored
   by Word/Libre Office*/
body  {
   font-family: Calibri;
   font-size: 11pt;
   background-color: white;
   padding-top: 1em;
   margin: auto;
   max-width: 35em;
}

/* Set the paragraph margin and
   padding to 0 except for the bottom */
p {
  padding: 0;
  margin: 0;
  margin-bottom: 10pt;
}

/* Center the table and add top/bottom margins */
table{
  margin: auto;
  margin-top: 1em;
  margin-bottom: 1em;
  border: none;
}

/* The tr padding/margin 0 is important for table
   import, while the font needs to be specified as
   font and not font-family/font-size due to limiations
   in Libre Office */
td, tr{
  font: 10pt Arial;
  padding: 0px;
  margin: 0px;
}

/* The cell should have a little space to easy reading
   although this section is mostly ignored by the
   Libre Office import */
td {
  padding: 4px;
  padding-bottom: 2px;
}

/* Set the headings to correspond to Word-style */
h1, h2, h3, h4, h5, h6 {
  margin: 10pt 0pt 0pt 0pt;
  font-family: Cambria;
  font-weight: bold;
}

/* h1 has a slightly larger top margins
   so we re-set that from the other*/
h1 {
  margin: 24pt 0pt 0pt 0pt;
  font-size: 14pt;
  color: #365F91;
}


h2 {
  font-size: 13pt;
  color: #4F81BD;
}

h3 {
  font-size: 11pt;
  color: #4F81BD;
}

h4 {
  font-size: 11pt;
  font-weight: bold;
  font-style: italic;
  color: #4F81BD;
}

h5 {
  font-size: 11pt;
  font-weight: normal;
  color: #243F5D;
}

h6 {
  font-size: 11pt;
  font-weight: normal;
  font-style: italic;
  color: #243F5D;
}

/* The following sections are mostly
   unrelated to Word/Libre Office imports */
tt, code, pre {
   font-family: 'DejaVu Sans Mono', 'Droid Sans Mono', 'Lucida Console', Consolas, Monaco, monospace;
}

a:visited {
   color: rgb(50%, 0%, 50%);
}

pre {
   margin-top: 0;
   max-width: 95%;
   border: 1px solid #ccc;
   white-space: pre-wrap;
}

pre code {
   display: block; padding: 0.5em;
}

code.r, code.cpp {
   background-color: #F8F8F8;
}

blockquote {
   color:#666666;
   margin:0;
   padding-left: 1em;
   border-left: 0.5em #EEE solid;
}

hr {
   height: 0px;
   border-bottom: none;
   border-top-width: thin;
   border-top-style: dotted;
   border-top-color: #999999;
}

@media print {
   * {
      background: transparent !important;
      color: black !important;
      filter: none !important;
      -ms-filter: none !important;
   }

   body {
      font-size:11pt;
      max-width:100%;
   }

   a, a:visited {
      text-decoration: underline;
   }

   hr {
      visibility: hidden;
      page-break-before: always;
   }

   pre, blockquote {
      padding-right: 1em;
      page-break-inside: avoid;
   }

   tr, img {
      page-break-inside: avoid;
   }

   img {
      max-width: 100% !important;
   }

   @page {
      margin-top: 2cm;
      margin-bottom: 1.5cm;
      margin-left: 3cm;
      margin-right: 3cm;
   }

   p, h2, h3 {
      orphans: 3; widows: 3;
   }

   h2, h3 {
      page-break-after: avoid;
   }
}
If you want to generate your own custom CSS I suggest you start by tweaking the original CSS that you can find here. While I thought the heading colors were a little silly at the beginning I now like how they softly integrate into the text. Microsoft probably put top designers when generating the default style for Word and I think it is sensible to trust their judgment, their settings is probably a pretty safe starting point.
A few HTML basics
HTML (HyperText Markup Language) was developed in 80:s and has remained the main way to communicate documents on the web. Although it has been refined over the years the basic structure is mostly the same. The document markup consists of <start> </end> tags, where the text within <> contains the element type. The basic structure of the document is:
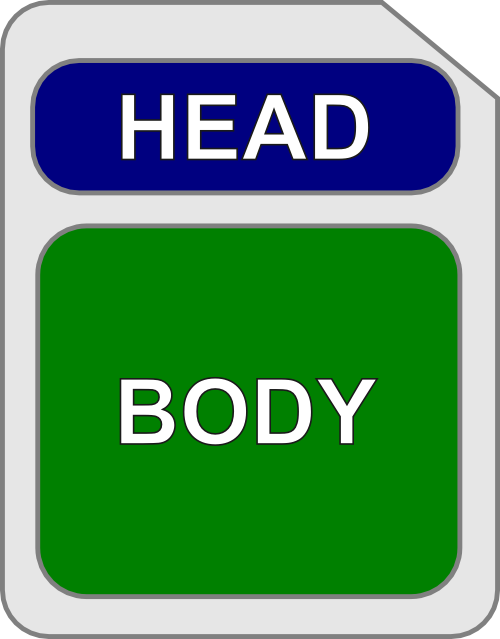
Everything is wrapped within the main document, the <html> corresponds to the grey area. Subelements to the <html> are the <head> and <body> elements. The <head> contains meta-data not shown in the document and the style sheet should be defined within this area. The <body> contains the actual text with all the paragraphs, tables, and images.
CSS and HTML
As you may have noticed the <body> element was also present in the CSS-elements above. CSS you can set the CSS properties of each <body> element, you can for instance see that the paragraph element, <p>, has the attributes:
p {
  padding: 0;
  margin: 0pt 0pt 10pt 0pt;
}
The above states that the padding should be 0 on all sides while the margin should be 10 points below. The 4-in-1 description of the different sides can be confusing although all you need to remember is TRouBLe (top, right, bottom, left). If you still feel a little queasy you can go with the specific parameter by expanding the above into:
p {
  padding: 0;
  margin: 0pt;
  margin-bottom: 10pt;
}
You can also find the headings <h1>, <h2>, <h3>, … (the number corresponds to the heading level), first with the common attributes:
h1, h2, h3, h4, h5, h6 {
  margin: 10pt 0pt 0pt 0pt;
  font-family: Cambria;
  font-weight: bold;
}
And then with specific attributes for each heading later on (although note that the margin setting is also overridden in the .RProfile due to the Libre Office incompatibility):
h1 {
  margin: 24pt 0pt 0pt 0pt;
  font-size: 14pt;
  color: #365F91;
}
Using this knowledge you should be able to tailor your document layout to your needs. Remember though that Word/Libre Office has not prioritized handling HTML and you may need to try some different alternatives before you get it to work.
Useful HTML-features
I’ve found that <sup> </sup> for superscript is very convenient although markdown has a shorthand for this ^ where you write 106 as 10^6. Perhaps more useful is subscripting <sub> </sub> with that currently doesn’t work as intended in default RStudio markdown (H~2~O does not translate into H2O while H<sub>2</sub>O does, note that the H~2~O works with Pandoc).
Special characters
Another thing that is very useful is special characters. Special characters basically any characters outside the English alphabet. Some very useful for tables are for instance the daggers and similar:
| Code† | Glyph | Description |
|---|---|---|
| † | † | Dagger |
| ‡ | ‡ | Double dagger |
| § | § | Section sign |
| • | • | Bullet |
| ˙ | ˙ | Dot accent |
| ¤ | ¤ | General currency sign |
| ° | ° | Degree sign |
| ‰ | ‰ | Per mill sign (10-3) |
| ≈ | ≈ | Approximate sign |
| &plusm; | ± | Plus minus |
| † Just enter the code and it should work, don’t forget the & and the ending ; without any intervening space | ||
Well that’s it for this part, I hope you enjoyed it.
Have you given any thougth to using pandoc for the export into word? I build a small example here, it works with ubuntu as well as with windows: https://github.com/ojessen/Example_knitr
Thank you for sharing the example. I like Pandoc and I commented on it in my intro, it is definitively useful but due to it’s limitations with table design I don’t use it. As far as I understand it Pandoc skips any advanced HTML.
I definitely agree the default CSS style needs improvement. Frankly, I do not quite like it, either. Perhaps we will change the default style in the future.
If you check out the last two vignettes in knitr, you may see two of my own favorite styles: http://cran.r-project.org/web/packages/knitr/
Thanks for this great series (and right when I need it!) It’s great to see this process streamline better and better.
A couple of points I found useful from here: http://blogs.cetis.ac.uk/adam/2013/10/25/changing-style-knitr-and-markdown-in-rstudio/
– You can make a project specific .Rprofile in the folder of the project.
– Remember to re-open the project for this to take effect.
Thanks for this Max, and thanks O & Y for also sharing some examples.
Yihui, can the Linear Docco style elements can be read and implemented (effectively cut and paste) into a css file? That example addresses many of the elements that don’t please my eye in either the default css or MG’s MS word leaning one.
David,
I don’t think Yihui automatically receives e-mail updates from my blog. That said I would suggest that you use Firefox with the Firebug-plugin. Through that you can inspect each elements CSS-properties, tweak it to your liking and then update your CSS-file accordingly.
Note though that the FTP-concept is partly about being able to import your document into a word-processor and these have serious limitations in their CSS-capabilities. You may need to take that into account.
If you have a CSS that you like and works nicely with Word/LibreOffice, please share – I’ll gladly add it to the post – my email is max at gforge dot se
Hi Max
thank you for this very useful article. Helped me to feel better with knitr.
Just a hint for your readers: If anybody does not succeed with .RProfile, he shoul try .Rprofile.
Regards Hans
Thank you for the wonderful tutorial. It has helped the visual appeal and readability of my knitr documents a lot.
One thing I was not able to figure out is how one can adjust the “white space” (margins?) in the CSS file. I’m talking about the L and R margins that are too wide for my taste (especially with figures). I played around with the CSS margin: statement to no avail.
Many thanks,
Thomas
Thanks! This has been on my todo-list for a while and since 2 min. back you can do it in the 0.1.2 version. Use the “css_max_width” parameter, e.g.
css_max_width: 80em.Good luck!
Max
Nice! But 0.1.2 version of what ?
Thank you
The Grmd-package